How to Build a Shed Ramp
A shed ramp is extremely important to any shed that you want to store any type of small riding lawn mower, or maybe even a bigger machine like a riding lawn tractor. A ramp can be beneficial in moving your equipment in and out of your shed. This is a vital part when learning how to build a shed ramp for any backyard garden or barn shed. You also need to make sure that your ramp will work to your advantage. You need to build it properly.
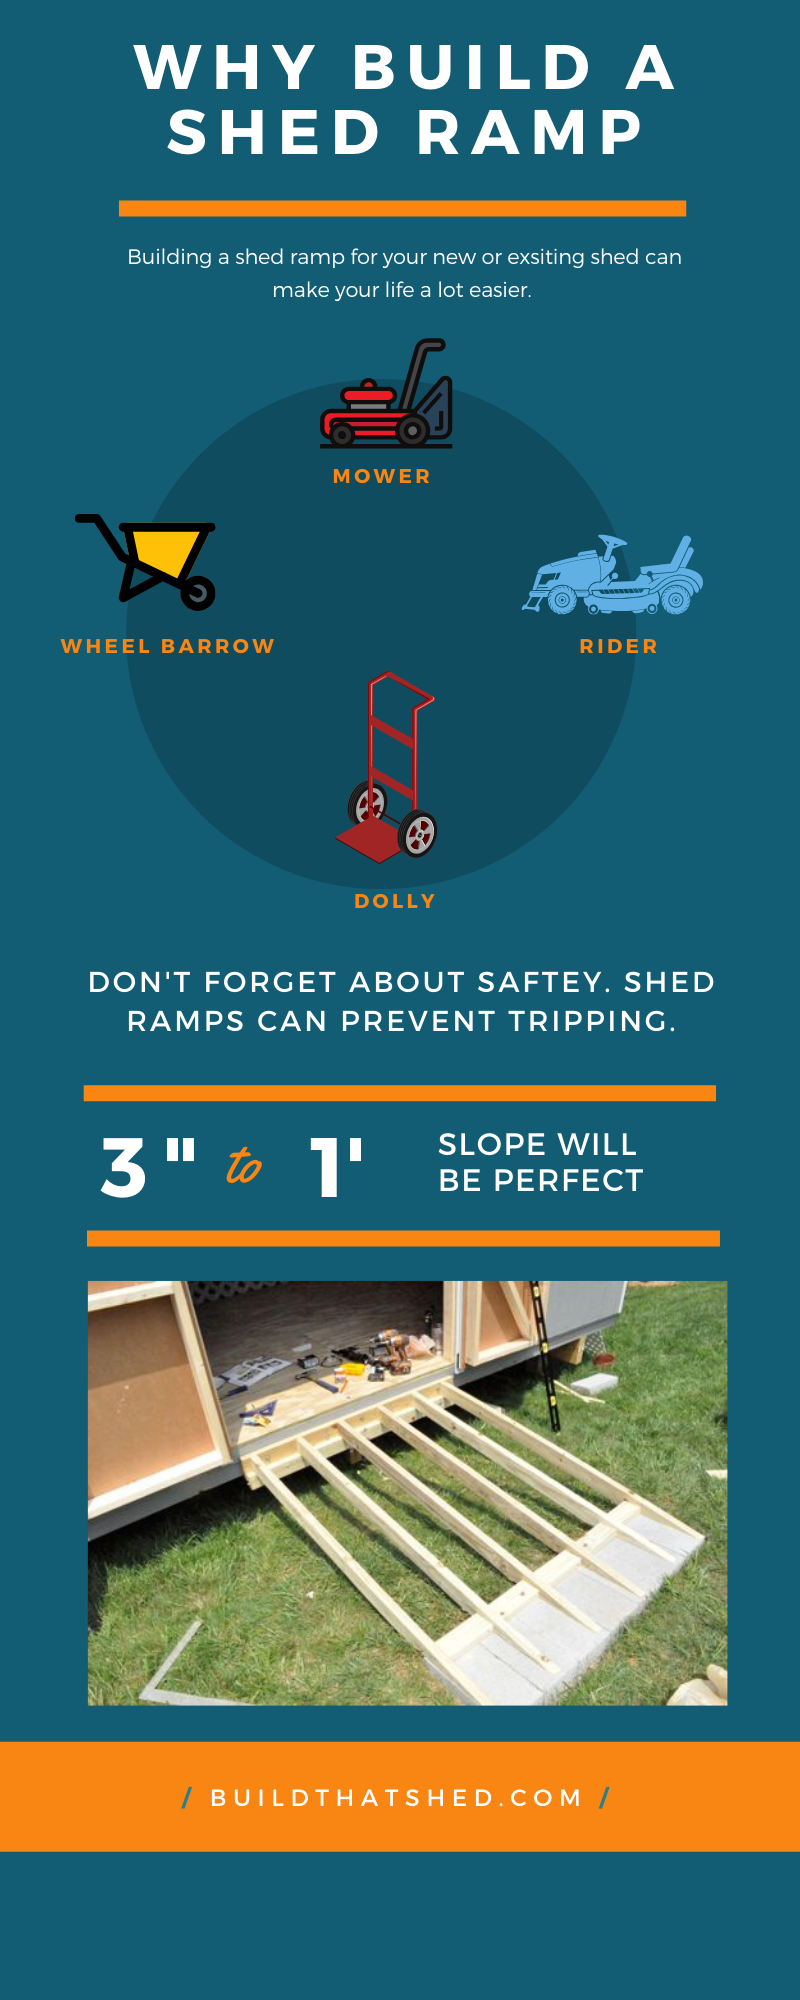
There are two main things to consider for your shed ramp plans. Size and slope. Make sure to consider these when building a garden shed ramp. Along with slope and size, there are a few other factors needed when learning how to build a shed ramp.
Only $37 for 12,000 shed plans
Here are those factors.
The slope of the ramp – double-check the location of your backyard storage shed. You don’t want to build a shed and later find out that the storage shed ramp won’t fit. The length of your ramp relies on the slope that you have chosen. Choosing the slope of your ramp is extremely important, as this can be the determinant of the convenience of use and its safety. It is also imperative that you plan the slope well and consider what type of equipment will be used on the shed ramp.
Safety – a poorly planned steep slope would clearly create problems for you to defy gravity, once you start moving your machinery in and out of the garden shed. If you’re pushing a heavy mower up a steep ramp, there is a greater chance that you might slip and get crushed. Safety needs to be an important factor when building a shed ramp. Besides, building codes need to be considered. Most require an 8 to 1-inch slope. Besides building codes on how to build a shed ramp, also research other codes at your local city office.
Ease of use – while most ramps don’t need to support a car or truck, you still need to build the shed ramp to support your riding lawn mower, as mentioned earlier. You may start to think that having a reasonably smart slope and enough driving area would be enough, but that isn’t the case. Many of those machines have low-hanging mower decks that may hang up on the way into the storage shed. Just one more thing to think about when considering how to build a shed ramp.
The surface of the ramp – be aware of the surface of the wood, steel, or concrete, rain, and other factors may cause your ramp to become slippery, thus increasing the risk of accidents. To prevent this, using rubberized flooring or anti-slip paint can help decrease the risk of falling on your shed ramp. Galvanized wire or custom metal sheets with dull spikes can even help increase the slip resistance of your ramp.
These are the most important essential factors that you must always bear in mind when building a shed ramp. Include this in your shed ramp plans so that you will not forget about any of these shed ramp tips.
Just like when you use safety glasses around power tools, your new storage shed ramp needs to fit the needs of the machines you will be storing in the shed.
While your outdoor garage is getting cramped, it’s time to have a storage shed along with a shed ramp for storing yard tools, gardening supplies, pool chemicals, and other outdoor equipment. But as most permanent storage sheds are placed on a foundation pad or footing, you get a level difference of 9 to 14 inches above the ground.
Hence, building a shed ramp is essential when you need to get heavy garden machinery and riding movers in and out of the storage shed. It makes loading and unloading of heavy equipment from your shed or garage safe and easy, thereby reducing the risk of accidents.
So here is a brief guide and tips on how to build a ramp for a shed:
Why do I need a shed ramp?
Before you can have your storage shed placed, you prepare a solid, leveled base, including gravel or crushed stone with either treated wood foundations or concrete foundation blocks. For large sheds, you require strong foundations to uniformly transfer the load.
Similarly, keeping in view the overall topography of the area, you can’t place storage sheds directly on the ground. So, due to the level difference between the floor level and the adjacent ground level, you have to build a storage shed ramp of suitable length and slope provision for safe and stress-free movement of heavy equipment in and out of the garage.
How long should I make the shed ramp?
Choosing the length and slope of the shed ramp is a very important part of your shed planning for getting the maximum benefit out of it. Whether you’re using shed ramp plans or have your own shed ramp ideas, an ideal shed ramp will have a shallow slope and excess length for ease of use. But you have to make sure that there is sufficient space available in front of the shed.
How to build a shed ramp with a good slope angle
The slope and length required are governed by the height from the external ground level to the shed floor. Regarding the slope selection, here are some recommendations for building a shed ramp:
For public ramps, the steepest slope allowed is 1:12, which means one inch rise for every 12 inches horizontally. This slope is governed by the ease of use for wheelchair users.
For general public buildings, the recommended maximum slope is 1:8, which means one inch rise for every 8 inches horizontally. So, if you go with 1:8 and your floor level difference is 12 inches, the required length of the ramp will be 8 feet.
If you don’t have that much longer available, you can go steeper up to about 1:4, but it will increase the risk of slipping, so you have to make adjustments accordingly. You can use anti-slip paint or staple down the metal sheet on the ramp surface.
Regarding the width of the ramp for the shed, you should at least provide a six-inch ramp on both sides of your door openings. This will make it easy for the machines to move in and out.
How to build a ramp for a shed?
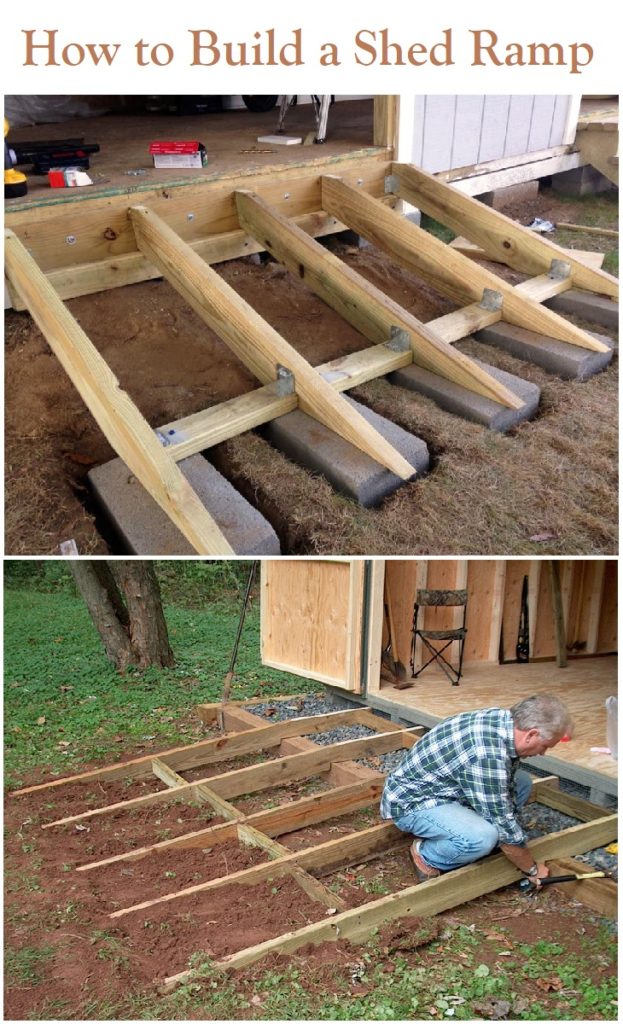
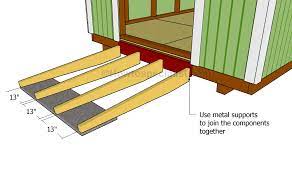
Now, to start, you need to provide a ledger board by mounting it flush with the face of the shed floor. You may have to rip off the framing of the shed if it sags underneath the door. A Ledger board of 2×6 inches is commonly used, which can be anchored underneath the shed door with lag screws and washers.
Shed ramps on the ground at the proper angle.
The next step is to mark the area of the shed ramp on the ground, keeping in view the length you selected in the previous step. Measure the distance from the face of the shed and dig holes for the supporting concrete blocks underneath the ramp.
Shed ramps on blocks to protect the joists
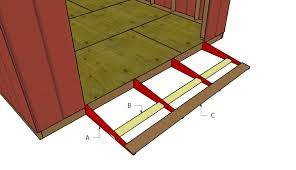
After fixing the concrete blocks, you now have to measure and cut stringers. Measure the distance from the far edge of the concrete blocks to the ledger board. Cut the stringers up to this length and secure each stringer with screws into the ledger board.
Shed ramps should have proper joist spacing
Keeping in view the spacing between the stringers, you may have to provide a spacer between the stringers. So, cut the blocks and screw them between the stringers. The last step is to cut the ramp boards to length, drill predrilled holes, and screwed the boards to the stringers.
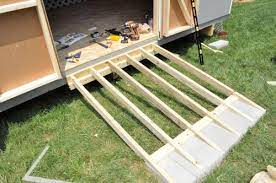
Make sure to secure the ramp boards properly with the stringer and into the concrete (using concrete anchors).
Love you’re work. Might wanna try this 12,000 shed plans that I just discover.
So many forget the cost associate with building 12/2021 ramps. I just completed one for a customer who came to me because I work a lower price then most. But materials I have no control over pricing. I built a 8 wide x12 long, one side was 24 inches off the ground the other side 12 inches.
I instead of block for the footing poured concrete because of the uneven ground. ( 18 bags concrete 10 bags crushed 57 stone) I put two 1×4 side by side on top of the pad before concrete set, so I could secure the 4 boards to concrete ( trick I use instead of bolting to concrete when dry) A header board i used was 2 2×6 glued and nailed together, then bolted to shed.
Todays pricing material was approx 1100 and my labor 700. When completed i had to regrade area, mix concrete with soil to give a firm base up to the ramp for his tractors.
There is alot of work, tools, equipment involved, don’t be afraid to ask questions, research material and approximately time to complete.
Most important if you hire someone, pay attention to equipment they use and the cost associated to purchase. My equipment i used on this specific job, cost me new 30k for tractor backhoe, trailer 7k, truck 66k, Compound Saw 400, skill saw 145, table saw 600, screw gun 210, nail gun 145, battery’s 50 a piece. This is the part all forget, which never includes maintenance, fuel, oil, insurance etc… So do your homework if you decide to hire, and understand why the labor doesn’t cost 20hr. I charge 65hr, heavy equipment i charge 165 for first 4 hours, then regular rate of 65hr. I also give discount of 10% labor for seniors 5% for first time customers, and always end up giving hours up free to help keep costs down. Its usually never appreciated, but I feel everyone’s pain, why I bill weekly so no surprises, and if ends up being more then they anticipated we make arrangements etc. We all need to work together for a better tomorrow. Humanity speaks volumes.